Hi guys, In this tutorial we will learn how to create a secure API in Laravel using the JSON Web Token (JWT). To secure the User Authentication API in Laravel 9, we will use the third-party jwt-auth library and As well as will show you how to install jwt auth and configure jwt auth in laravel 9 app.
JSON Web Token (JWT) is a best secure api authentication and laravel is a best framework for web applications. so now we make api step by step.
- Step 1: Laravel Installation
- Step 2: Database Connection
- Step 3: Create Database Table
- Step 4: Install JWT Package
- Step 5: Setup User Model
- Step 6: Setup Auth guard
- Step 7: Setup Routes
- Step 8: Setup Authentication Controller
- Step 9: how to use this api url for post man
Step 1: Laravel Installation
Now we need to install the project first so go to the root folder of your web server and then run the following command to install the fresh Laravel project.
composer create-project laravel/laravel laravel-jwt-api
--prefer-dist: Unlike --prefer-source, Composer will install remotely if possible. On build servers and other use cases you can speed up installation significantly where you don't normally run vendor updates. There is also a way to avoid git problems if you do not have the right setup.
Step 2: Database Connection
Go to inside the application, we have a .env file, so open .env file and edit following code
DB_CONNECTION=mysql
DB_HOST=127.0.0.1
DB_PORT=3306
DB_DATABASE=laravel-jwt-api
DB_USERNAME=root
DB_PASSWORD=*********
Step 3: Create Database Table
After Connect Database if you are create new laravel project so create table using migration.
Now if you need table then use following command and create db table.
php artisan migrate
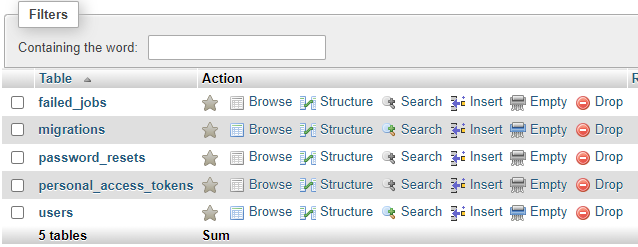
The above command has created a users table inside the database.

Step 4: Install JWT Package
How does JWT work?
User information, such as username and password, is sent to the web-server using HTTP GET and POST requests. The web server recognizes user information and generates a JWT token and sends it back to the client. The client store that tokens the session and sets it on the header. On the next HTTP call, it is verified by the token server, which responds to the client.
JSON Web Tokens consists of three different parts by dots (.) In its ganse form.
- Header
- Payload
- Signature
LIKE: aaaaaaaaaaa bbbbbbbbbbbb cccccccccccccc
Why JWT is a Important?
JWT is used for authentication and information exchange between server and client. It validates the incoming request and provides an additional level of security to the REST API, which is ideal for security purposes.
Now use the following command to install the latest JWT package.
composer require tymon/jwt-auth
Above command installed the jwt-auth package, Now go to config/app.php file and add providers and aliases array, it is following below code.
'providers' => [

    ----------------------------------
    ----------------------------------

    Tymon\JWTAuth\Providers\LaravelServiceProvider::class,

],

'aliases' => [

    ----------------------------------
    ----------------------------------

    'JWTAuth' => Tymon\JWTAuth\Facades\JWTAuth::class,
    'JWTFactory' => Tymon\JWTAuth\Facades\JWTFactory::class,

],
Now the next step, we publish the package, which is the following command.
php artisan vendor:publish --provider="Tymon\JWTAuth\Providers\LaravelServiceProvider"
After install JWT package, we need JWT Secret key, which is the following command.
php artisan jwt:secret
We have successfully generated the JWT Secret key, and you can check this key inside the .env file.
JWT_SECRET=secret_jwt_string_key
Step 5: Setup User Model
Now User model we need use Tymon\JWTAuth\Contracts\JWTSubject , so check following bellow code and edit your app/User.php file.
<?php

namespace App\Models;

use Illuminate\Notifications\Notifiable;
use Illuminate\Contracts\Auth\MustVerifyEmail;
use Illuminate\Foundation\Auth\User as Authenticatable;

// JWT contract
use Tymon\JWTAuth\Contracts\JWTSubject;


class User extends Authenticatable implements JWTSubject {
    use Notifiable;

    /**
     * The attributes that are mass assignable.
     *
     * @var array
     */
    protected $fillable = [
        'name', 'email', 'password',
    ];

    /**
     * The attributes that should be hidden for arrays.
     *
     * @var array
     */
    protected $hidden = [
        'password', 'remember_token',
    ];

    /**
     * The attributes that should be cast to native types.
     *
     * @var array
     */
    protected $casts = [
        'email_verified_at' => 'datetime',
    ];

    /**
     * Get the identifier that will be stored in the subject claim of the JWT.
     *
     * @return mixed
     */
    public function getJWTIdentifier() {
        return $this->getKey();
    }

    /**
     * Return a key value array, containing any custom claims to be added to the JWT.
     *
     * @return array
     */
    public function getJWTCustomClaims() {
        return [];
    }
}
Step 6: Setup Auth guard
Now, we need to set up JWT Ath Guard to secure the application's authentication process. The Laravel Guard uses a session driver to protect the soldiers. However, we have set the default guard on the API, and the API guards are commanded to use the jwt driver
Place the following code in config/auth.php file.
'defaults' => [
    'guard' => 'api',
    'passwords' => 'users',
],


'guards' => [
    'web' => [
        'driver' => 'session',
        'provider' => 'users',
    ],

    'api' => [
        'driver' => 'jwt',
        'provider' => 'users',
        'hash' => false,
    ],
],
Step 7: Setup Routes
Now, next step we need authentication api routes for laravel applications, so in this step we make routes
We go to route/api.php file and this file create routes so following below code
<?php

use Illuminate\Http\Request;
use Illuminate\Support\Facades\Route;

/*
|--------------------------------------------------------------------------
| API Routes
|--------------------------------------------------------------------------
|
*/

Route::group([

    'middleware' => 'api',
    'prefix' => 'auth'

], function ($router) {

    Route::post('login', 'AuthController@login');
    Route::post('register', 'AuthController@register');
    Route::post('logout', 'AuthController@logout');
    Route::post('refresh', 'AuthController@refresh');
    Route::post('profile', 'AuthController@profile');

});
Step 8: Setup Authentication Controller
In this step, we will create the JWT Authentication Controller, and in this Oath Controller, we will define the main logic for the secure authentication process in Laravel applications
Now create Controller automatic, which is the following command.
php artisan make:controller AuthController
After run above command we have a app/Http/Controllers/AuthController.php file and this file edit following code
<?php

namespace App\Http\Controllers;

use Illuminate\Support\Facades\Auth;
use Illuminate\Http\Request;
use Validator;
use App\Models\User;


class AuthController extends Controller {

    /**
     * Create a new AuthController instance.
     *
     * @return void
     */
    public function __construct() {
        $this->middleware('auth:api', ['except' => ['login', 'register']]);
    }

    /**
     * Get a JWT via given credentials.
     *
     * @return \Illuminate\Http\JsonResponse
     */
    public function login(Request $request){
        $validator = Validator::make($request->all(), [
            'email' => 'required|email',
            'password' => 'required|string|min:6',
        ]);

        if ($validator->fails()) {
            return response()->json($validator->errors(), 422);
        }

        if (! $token = auth()->attempt($validator->validated())) {
            return response()->json(['error' => 'Unauthorized'], 401);
        }

        return $this->createNewToken($token);
    }

    /**
     * Register a User.
     *
     * @return \Illuminate\Http\JsonResponse
     */
    public function register(Request $request) {
        $validator = Validator::make($request->all(), [
            'name' => 'required|string|between:2,100',
            'email' => 'required|string|email|max:100|unique:users',
            'password' => 'required|string|confirmed|min:6',
        ]);

        if($validator->fails()){
            return response()->json($validator->errors()->toJson(), 400);
        }

        $user = User::create(array_merge(
                    $validator->validated(),
                    ['password' => bcrypt($request->password)]
                ));

        return response()->json([
            'message' => 'User successfully registered',
            'user' => $user
        ], 201);
    }


    /**
     * Log the user out (Invalidate the token).
     *
     * @return \Illuminate\Http\JsonResponse
     */
    public function logout() {
        auth()->logout();

        return response()->json(['message' => 'User successfully signed out']);
    }

    /**
     * Refresh a token.
     *
     * @return \Illuminate\Http\JsonResponse
     */
    public function refresh() {
        return $this->createNewToken(auth()->refresh());
    }

    /**
     * Get the authenticated User.
     *
     * @return \Illuminate\Http\JsonResponse
     */
    public function userProfile() {
        return response()->json(auth()->user());
    }

    /**
     * Get the token array structure.
     *
     * @param  string $token
     *
     * @return \Illuminate\Http\JsonResponse
     */
    protected function createNewToken($token){
        return response()->json([
            'access_token' => $token,
            'token_type' => 'bearer',
            'expires_in' => auth()->factory()->getTTL() * 60,
            'user' => auth()->user()
        ]);
    }

}
Authentication Controller we use __construct and this __construct call auth middleware and check every time url access or not
$this->middleware('auth:api', ['except' => ['login', 'register']]);
login and register route using without token so in this array add route name this route no need token means direct access.
Start the laravel application with following command:
php artisan serve
After run above command we have a http://127.0.0.1:8000 url and this is a root url.
Now laravel 8 api part is a finished so next step we will learn how to use this api using postman.
Step 9: how to use this api url for post man
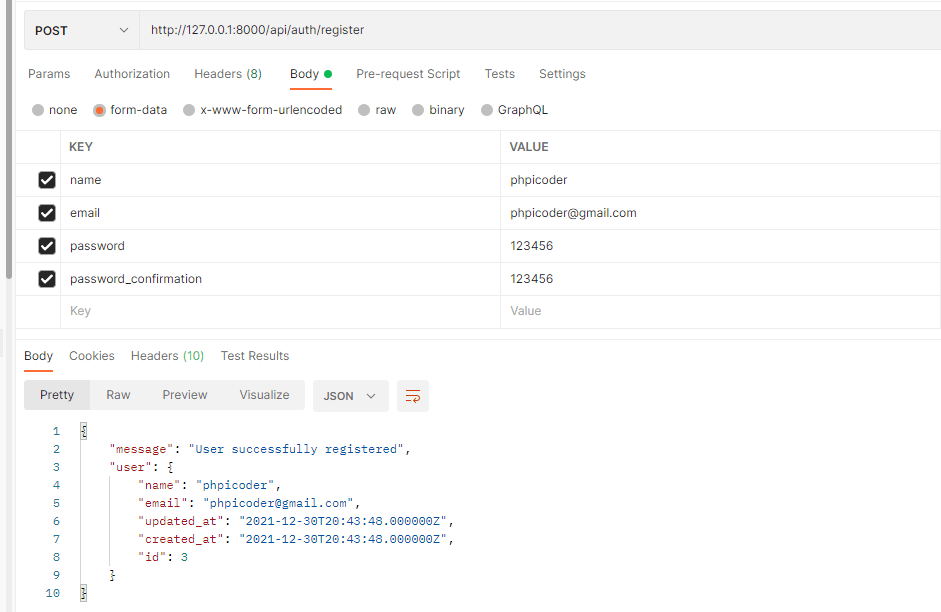
http://127.0.0.1:8000/api/auth/register
This url using without token which is the following image

http://127.0.0.1:8000/api/auth/login
This is a login API route, This API requires an email and password value and check if this email and password is right then return token and this token access other api url.
Now see image below

http://127.0.0.1:8000/api/auth/profile
profile api the access token as a header field, and get User Profile info
Now See image below

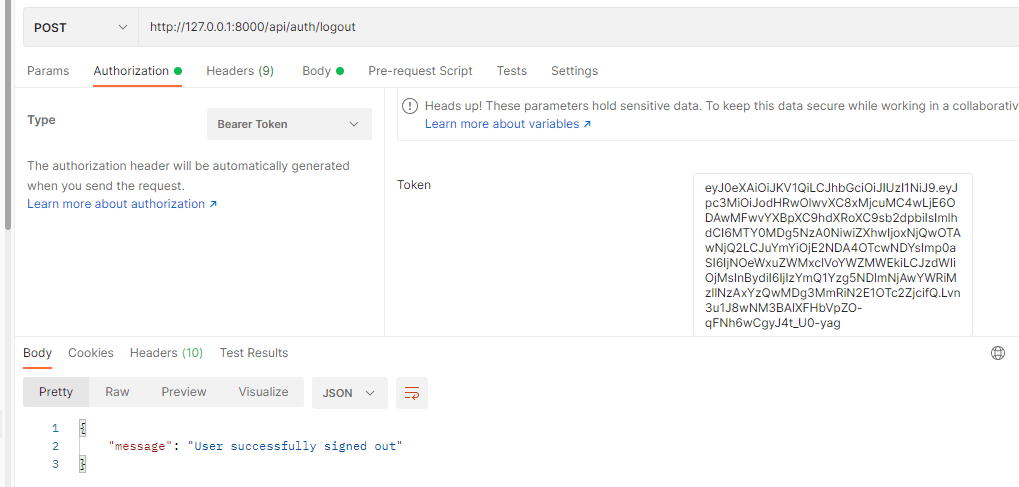
http://127.0.0.1:8000/api/auth/logout
We destroyed the JWT token on logout and you can use Postman to test the Logout API as follows image.

Now we finish laravel 8 api using jwt auth and you need full code? if yes so go to github
https://github.com/phpicoder/laravel-jwt-auth-api
I hope this tutorial help for you.


